Are you stuck on how to start your design brief? A well-structured design brief is a crucial tool in any successful project, helping streamline the process and keeping everyone on the same page.
This guide will walk you through crafting an effective and detailed design brief in 8 easy steps-with templates for every type of project! Ready to make your next project flawless? Let’s dive right in.
Key Takeaways
- A design brief is a document that outlines the objectives, requirements, and expectations of a design project.
- To write an effective design brief, choose the right project management software to organize your work and collaborate with your team.
- Describe the project clearly and concisely in the design brief, including specific details about what needs to be accomplished and any specific requirements or constraints.
- Set SMART goals for your project – Specific, Measurable, Achievable, Relevant, and Time-bound – to provide clarity and track progress.
- Define the target audience for your design project by conducting research on their demographics, interests, preferences, and behaviors.
- Determine the budget and timeline for your project to ensure all stakeholders understand the scope of work and avoid delays or overspending.
- Identify expected deliverables from your design project so everyone knows what needs to be created.
- Include any other relevant information in your design brief such as specific requirements or preferences that will help guide designers in meeting your vision.
What is a Design Brief?

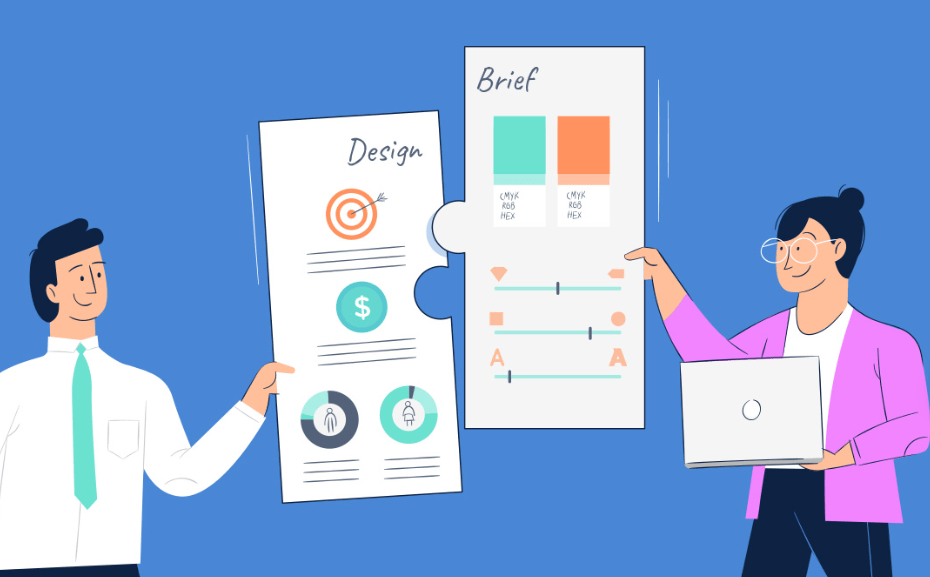
A design brief is a document that outlines the objectives, requirements, and expectations of a design project. It serves as a roadmap for designers, ensuring that everyone involved is on the same page and working towards common goals.
Design briefs are important because they provide clarity and direction, helping to streamline the design process and produce effective results.
Definition
A design brief is a key tool. It tells what the project needs to do and who it should reach. This guide maps out the work, lists goals, and shows who will use the result. It sets clear limits on what can be done.
The team uses this as a roadmap for their tasks.
Why It’s Important
A design brief holds big value. It gives a clear view of what the project must do. It helps to choose the right methods and tools. The team gets to know what they need to get done in terms of work tasks, goals and deadlines.
This brings all people involved together on the same page with less confusion or mix-ups. Having this tool makes sure all steps taken are aimed at getting good results and meeting set goals for your project or business needs.
How to Write a Design Brief in 8 Easy Steps
A design brief is a key tool for any project. Follow these steps to write one:
- Pick your design brief project management software. This will help you organize the work.
- Write about your project. Make it clear and short.
- Set SMART goals for your project. These goals should be specific, measurable, achievable, relevant, and time-bound.
- Know who your target audience is. Understand their needs and wants.
- Decide how much money and time you can spend on the project.
- Think about what items you should deliver at the end of the project.
- Add other important details that might help your team understand the project better.
- Share all this information with your team so they know what’s going on.
Step 1: Choose Your Design Brief Project Management Software
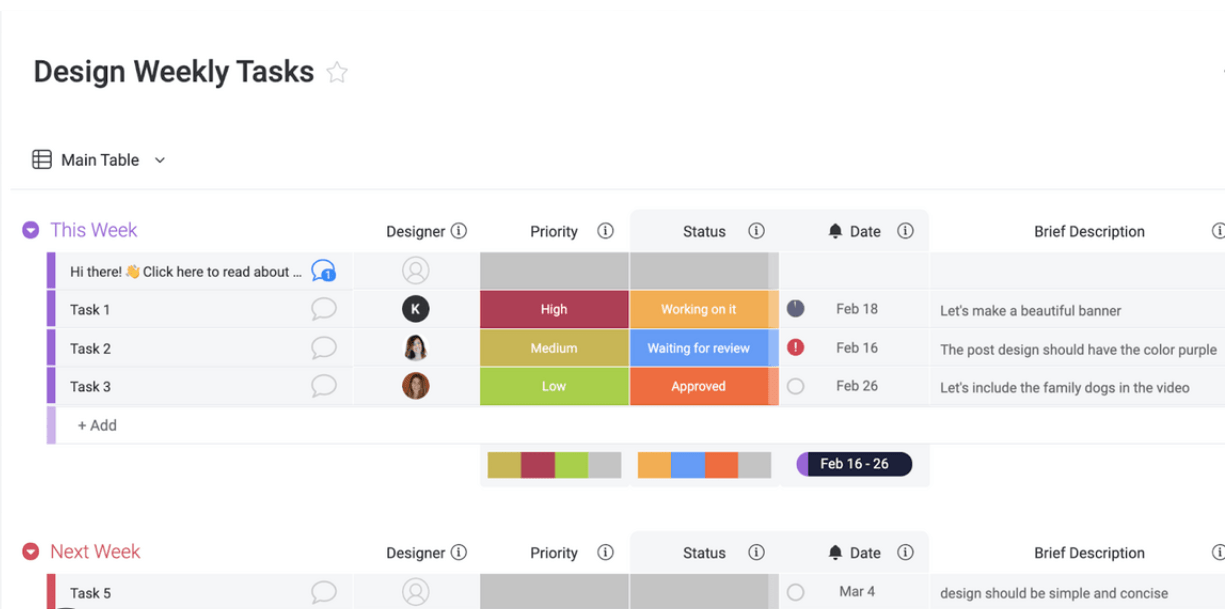
To start writing a design brief, the first step is to choose the right project management software. This will help you stay organized and collaborate with your team more effectively.
Look for software that allows you to create and store all your design brief documents in one place. It should also have features like task assignments, deadlines, and communication tools.
With the right software, you can easily track progress, share files, and keep everyone on the same page throughout the project.
Choosing the right project management software is important because it provides a centralized platform where you can manage every aspect of your design brief. It eliminates confusion and ensures that everyone involved has access to the latest information.
By using design brief project management software, you can streamline your workflow and make sure nothing falls through the cracks. So take some time to research different options and find one that meets your needs before moving onto the next steps of writing a design brief.

Step 2: Describe the Project
Describe the project clearly and concisely in the design brief. This is where you explain what you want to achieve with your design. Include important details like the objective of the project, what needs to be done, and any specific requirements or constraints.
For example, if you’re working on a website design, describe what pages and features it should have. If it’s a branding project, mention elements like logo, colors, and fonts that are needed.
Providing as much information as possible will help your team understand exactly what you’re looking for and ensure everyone is on the same page.
Remember to be specific about your goals for the project. What do you want to accomplish? Is it increasing brand awareness or generating more leads? Be clear about these objectives so that your team can align their work accordingly.
Additionally, consider mentioning any inspiration or references that might help guide the creative direction of the project. Share examples of designs or styles that resonate with your vision to provide context for your team.
By describing all these aspects in detail in your design brief document, it becomes easier for everyone involved – from designers to developers – to understand what needs to be done and deliver according to expectations.
Step 3: Set SMART Goals
To ensure a successful design project, it is important to set SMART goals. SMART stands for Specific, Measurable, Achievable, Relevant, and Time-bound. This means that your goals should be clear and well-defined, so everyone involved knows exactly what needs to be accomplished.
They should also be measurable, so you can track progress and determine if the goals have been met.
It’s crucial to set goals that are achievable within the given resources and constraints of the project. Make sure your goals are relevant to the overall objectives of the design brief and align with the needs of your target audience.
Lastly, make sure your goals are time-bound by setting deadlines for when each goal should be achieved. This will help keep everyone accountable and ensure that the project stays on track.
By setting SMART goals in your design brief, you provide a clear roadmap for success and increase the chances of achieving outstanding results for your design project.

Step 4: Define the Target Audience
To write an effective design brief, it’s important to define the target audience. The target audience refers to the specific group of people who will be experiencing or using the design product.
Understanding your audience helps you create a design that resonates with them and meets their needs.
When defining the target audience, it’s crucial to conduct thorough research and gather information about their demographics, interests, preferences, and behaviors. This can include factors like age, gender, location, education level, income level, hobbies, and buying habits.
By understanding your target audience’s characteristics and preferences, you can tailor your design to appeal to them effectively. For example, if your target audience is tech-savvy young adults interested in gaming, you might use bold colors and dynamic visuals in your design.
Remember that defining the target audience goes beyond demographics; it also involves understanding their pain points or challenges they may face. By addressing these concerns in your design brief and developing solutions for them through your design process,C user experience (UX) designers can create designs that provide value to their intended users.
In summary,C defining the target audience is an essential step in writing a design brief as it ensures that the final product speaks directly to those who will be interacting with it.
By thoroughly researching and understanding this key aspect of user experience,C designers can create designs that engage,c resonate,and meet the needs of its intended users.

Step 5: Determine Budget and Timeline
Before diving into the creative aspects of your design project, it’s essential to map out the practicalities. A comprehensive design brief mentions the estimated budget and timeline to ensure all stakeholders have a clear understanding of the project scope. This vital information assists in avoiding any misunderstandings during the project cycle, ensuring the project stays on track.
| Budget | Timeline |
|---|---|
| This pertains to the estimated total cost of the project. Costs may include designing, development, testing, and implementation stages. Keep in mind, it should be realistic and clearly defined to avoid ambiguity. | The timeline indicates the project duration. This includes the start date, key milestones, and the expected completion date. A well-defined timeline ensures that all team members are aware of the deadlines and helps in keeping the project on track. |
Remember, understanding the budget and timeline are crucial parts of the design brief process. They help keep the project within its resource constraints and ensure that the project moves forward with no delays or overspends.

Step 6: Identify Expected Deliverables
In this step, you need to decide what things or outcomes you expect from the design project. These are called deliverables. It could be things like a logo, website design, or marketing materials.
You should be specific about what you want and include it in the design brief. This helps everyone involved in the project understand what needs to be done and keeps everything organized.
Make sure to think about all the different pieces that might be needed for your design project and list them as expected deliverables in your brief.
Remember:
– Be clear and specific about what you want.
– List all the different things that should be included in the project.
– Include examples if possible to help everyone visualize what’s expected.
By identifying expected deliverables, you make sure that everyone is on the same page with what needs to be created for your design project.
Step 7: Include Any Other Relevant Information
In this step, you should include any other important information that is relevant to your design project. This could be things like specific requirements or preferences, existing branding guidelines, source materials or inspiration, and any additional details that will help the designers understand what you are looking for.
By including these extra details in your design brief, you can provide the designers with a clearer picture of what you want to achieve. It helps them make informed decisions about the design elements and ensures that they align with your vision and goals.
Remember to be as specific as possible when providing this information. The more details you give, the better understanding the designers will have of your expectations. This will ultimately lead to a more effective and successful design outcome.
For example, if you are working on a branding project, include information about the business’s mission statement, target market demographics, brand voice and personality. If it’s a graphic design project for marketing materials or a website redesign mention preferences regarding color schemes, imagery style or typography choices.
Including any other relevant information in your design brief helps set clear expectations from the beginning and guides the designers towards creating something that meets your needs exactly.
Step 8: Share with Your Team
Once you have finished writing the design brief, it’s time to share it with your team. Sharing the design brief ensures that everyone is on the same page and understands the project objectives and requirements.
It helps to avoid confusion and promotes collaboration among team members.
One way to share the design brief with your team is through a project management software or collaboration tool. This allows all team members to access the document easily and provide their input or ask questions if needed.
Consider scheduling a meeting or discussion where you can present the design brief to your team in person or virtually. This gives everyone an opportunity to ask clarifying questions, offer suggestions, and discuss any concerns they may have.
Remember that effective communication is key when sharing the design brief with your team. Ensure that everyone has a clear understanding of their roles and responsibilities, as well as any deadlines or deliverables outlined in the brief.
By sharing the design brief with your team, you are fostering a collaborative environment where everyone is working towards a common goal. It sets a foundation for success by aligning expectations and empowering each team member to contribute their expertise towards creating impactful designs.
Key facts:
– Sharing the design brief promotes collaboration among team members.
– Consider using project management software or collaboration tools for easy access.
– Schedule meetings or discussions to present the design brief in person or virtually.
– Effective communication ensures everyone understands their roles and responsibilities.
– By sharing the design brief, you create a collaborative environment for successful outcomes.

Design Brief Template
To make the process of writing a design brief easier, you can use a design brief template. This template provides a structure and format for your design brief, so you don’t have to start from scratch.
It includes sections for important information such as the project description, objectives and goals, target audience, budget and timeline, deliverables, and any other relevant details.
Using a design brief template can help ensure that you include all the necessary information in an organized way. It saves time and helps you stay focused on what needs to be included in each section.
Whether you’re working on graphic design, branding, UX, or product design projects, a design brief template can be customized to fit your specific needs.
With the right template in hand, you’ll have a clear structure to follow when writing your own design brief. This will make it easier for your team to understand the project requirements and expectations.
Ultimately, using a design brief template can help set everyone up for success by providing clarity and direction throughout the entire creative process.

Examples of Effective Design Briefs
Here are some examples of effective design briefs:
- A design brief for a marketing campaign that clearly outlines the project description, objectives, target audience, and goals. It also includes an analysis of the competition and specific deliverables.
- A design brief for a website redesign that defines the scope of the project, budget, and timeline. It identifies the target audience and their needs, as well as the desired user experience and design aesthetics.
- A design brief for a product packaging design that highlights the inspiration behind the design, such as nature or minimalism. It includes information on the brand identity and key messaging to be conveyed through the packaging.
- A design brief for a logo design that provides an overview of the business and its values. It outlines the desired look and feel of the logo, including color preferences and any specific symbols or imagery to be incorporated.
- A design brief for a brochure layout that specifies the content to be included, such as text and images. It also outlines any branding guidelines to be followed and provides examples of similar brochures for reference.
Conclusion
In conclusion, writing a design brief is an important step in any design project. By following the eight easy steps outlined in this article and using templates and examples, you can create a powerful design brief that sets clear objectives, defines your target audience, and outlines the scope of your project.
So go ahead and start writing your own effective design brief today!
Frequently Asked Questions
What is a design brief?
A design brief is a document that outlines the goals, requirements, and expectations for a design project.
Why is a design brief important?
A design brief helps ensure that everyone involved in the project understands the objectives, target audience, and constraints of the design.
How do I write a design brief?
To write a design brief, you need to gather information about your project’s goals and requirements, define your target audience and brand identity, outline any specific deliverables or deadlines, and provide examples or references for inspiration.
What are some essential elements to include in a design brief?
Some essential elements to include in a design brief are background information about your company or organization, project objectives and scope, target audience details, budget limitations (if applicable), timeline expectations, desired deliverables (such as logos or web designs), and any specific preferences or styles you have in mind.
Are there any templates available for writing a design brief?
Yes! There are many online templates available that can guide you through each section of a design brief and ensure you don’t miss any important details. These templates often include prompts to help you think through each aspect of your project.


